

Skeleton·ID user guides
3D Image Acquisition using Photogrammetry
Updated on August 7, 2023
A tutorial about cost-effective 3D scanning with photogrammetry
The forensic identification software Skeleton·ID requires a 3D model of a skull or a bone as postmortem data. Even though prices for professional 3D scanners have dropped over the last years, a professional 3D scanner still is an investment.
In this article, we are taking a look at an alternative 3D scanning system based on photogrammetry, consisting of two DSLR cameras combined with 3D reconstruction software. The technique used here is called 3D reconstruction from multiple images.
The costs of the system described here are around € 2.000, compared to commercially available high-resolution systems that cost anywhere between €15.000 and €35.000. The time effort required per object is about 90 minutes, of which taking the photographs takes about 20-30min, and then depending on the computational power of the used machine, the post-processing takes about 60 minutes. The last step is obviously mostly automatic. Under ideal conditions, the quality achieved with this system can rival (or even surpass) the results of a laser scanner.
Before we take a look a the process, one word about depth-sensing cameras like they are available in newer iPhones. Those are obviously the least expensive 3D scanning option. However, the resolution and accuracy are well above 1mm which is not sufficient for our forensic usage.
Two things need to be done when creating a 3D model from photographs:
- Take high-quality photographs from at least two different angles showing the object from all horizontal and vertical positions
- Process the set of photographs with specialized software to create a 3D model created from multiple images
A detailed step-by-step guide for both photo acquisition and processing can be downloaded for free at the end of this article.
How to take photos for photogrammetry
The general idea of photogrammetry is to use a camera (or multiple) that is facing the object (the skull in our case) from different angles. We use two cameras because it allows us to speed up the process considerably, but the result would be the same with only one.
Over a ten-second interval, our cameras are taking 36 pictures each, while the object is slowly being turned by a rotating platform. This allows us to take overlapping pictures that permit us to create the 3D model later. However, in order to create a complete 3D model that is accurate and valid from all sides, we need to turn the object on its side and repeat the process to also cover the top and the bottom of the object that would otherwise not be visible.
Before taking the pictures, it is important to attach a size marker (e.g. a label of known size) to the object, to later be able to scale the 3D model with software to its real-world size. Alternatively, an object of known size (e.g. a ruler) can be placed next to the object.

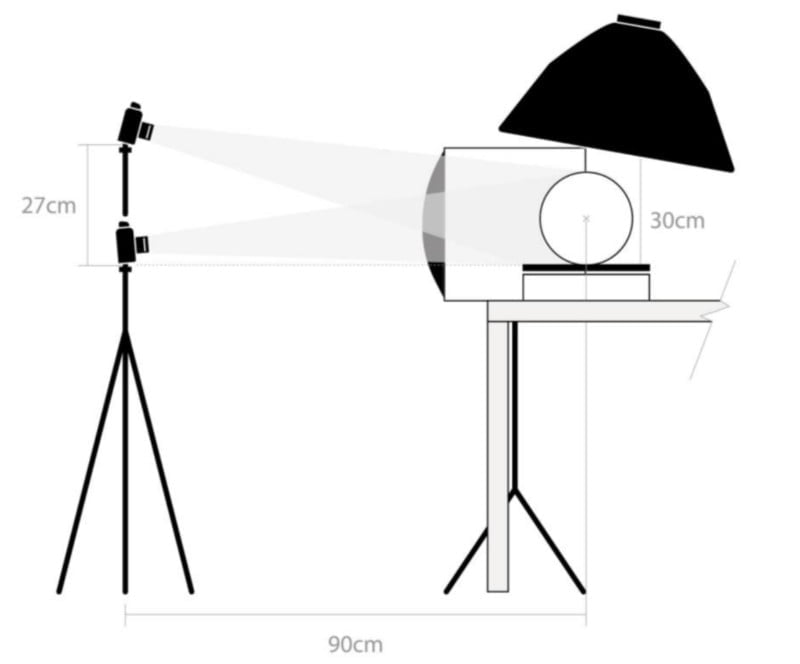
The setup described here uses two entry-level DSLR cameras. We decided to use two Nikon D520s with 60mm lenses. The camera is best used in manual mode. Also needed are a tripod, three spotlights, and a rotating platform.
The cameras are placed on a tripod above each other, pointing at the object that is being illuminated by the spotlights. The exact distances and angles are described in the manual. As far as the photography goes, the object should occupy the maximum available space in the picture without leaving it during rotation and it obviously needs to be focused at all times. We recommend using a remote shutter release to avoid vibrations caused by manually triggering the release.
How to turn photos into a 3D model
To process the resulting photographs, we are going to use two different software products: one for creating the 3D model from images and one for scaling the model to its correct size.
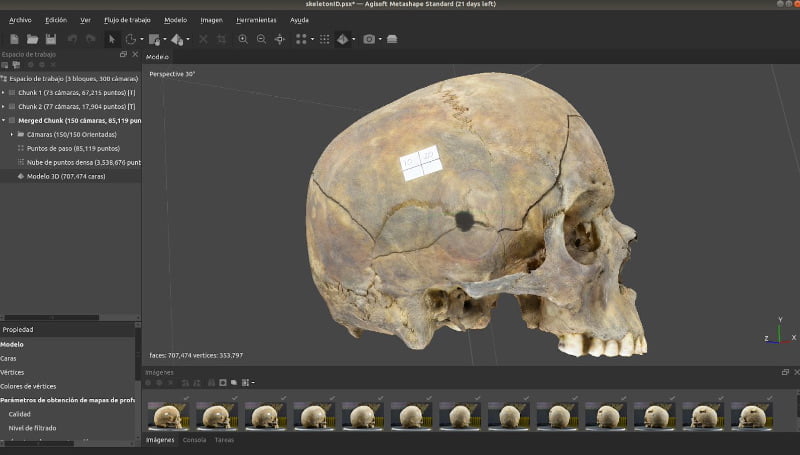
We decided to use Agisoft’s Metashape software as it is relatively inexpensive (there is also a free version) and easy-to-use. Our manual walks you through all the individual steps but here we only want to illustrate the general process.
Both picture series (horizontal and vertical) need to be imported into Metashape, but we will keep them in separate blocks for now. In the next step, the software adjusts the angles from the pictures were taken from. Then a point cloud for both series is being created.
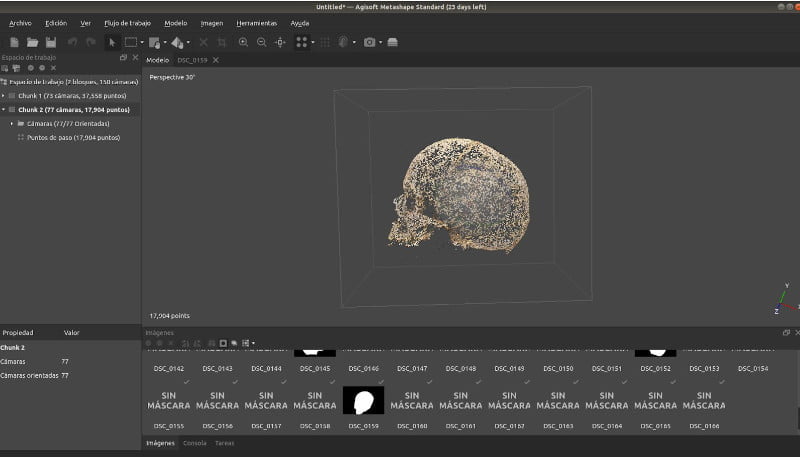
Afterward, a manual cleanup of the scene is required to remove points that are outside the object (comparable to using the eraser in Adobe Photoshop). In the next step, the software is going to merge the two-point clouds and turn them into a polygon mesh. Now, the 3D model only needs texture mapping which can be added with the same software. Once added, we can export the 3D model.
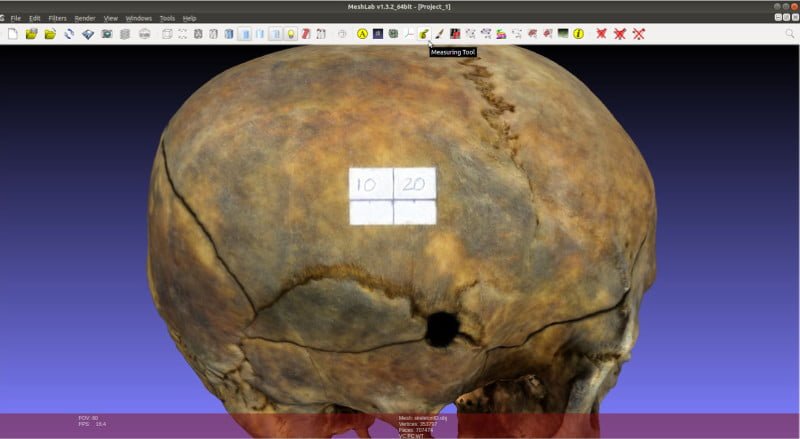
Now, the model needs to be scaled to its correct real-world size. For that, we will use open-source software called MeshLab. In order to scale the image correctly, we will make use of the sticker that we have attached to the object as a reference before we took the photographs. As we know the size of the sticker, we can use the measuring tool and then scale the sticker (and the object) to the correct size. However, any size reference like a ruler or an object of known size next to the object would obviously have the same effect.
As the final step, the 3D model can be exported as a standard file type and is ready for further processing.
Depending on the number of photos, the lighting, the quality of the lens, and the image resolution used, the precision of the resulting 3D model can reach micrometer accuracy. Below you can see a video of a 3D model obtained by scanning a skull with the photogrammetry system described here.