

Guides
3D Image Acquisition using Medical Images
Updated on July 25, 2024
Computed tomography
X-ray computed tomography (usually abbreviated to CT) is a common medical imaging technique that provides detailed, three dimensional internal images of the human body. A CT scan can be considered as the 3D counterpart of X-ray radiography. Rather than a single 2D image, a CT scan is a 3D volume, the content of which is usually shown as a series of slices taken along different directions.
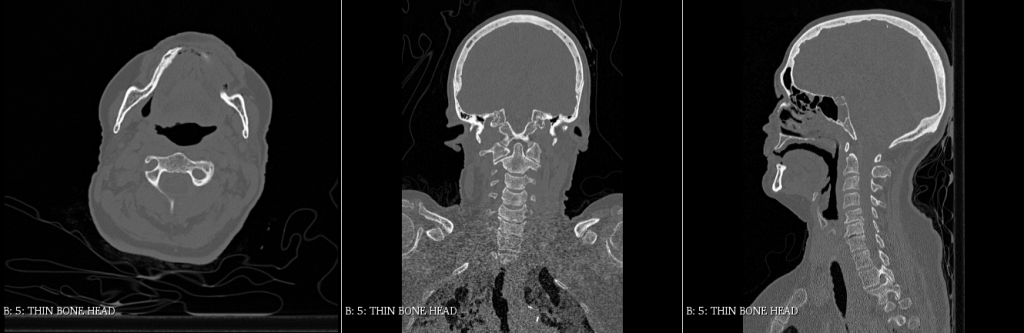
Just like radiography, CT is especially suited to image the skeleton and it provides a convenient way to create a 3D model of a skeletal structure of a (possibly living) subject. This article shows how this can be done using free software.
Processing a CT scan in 3D Slicer
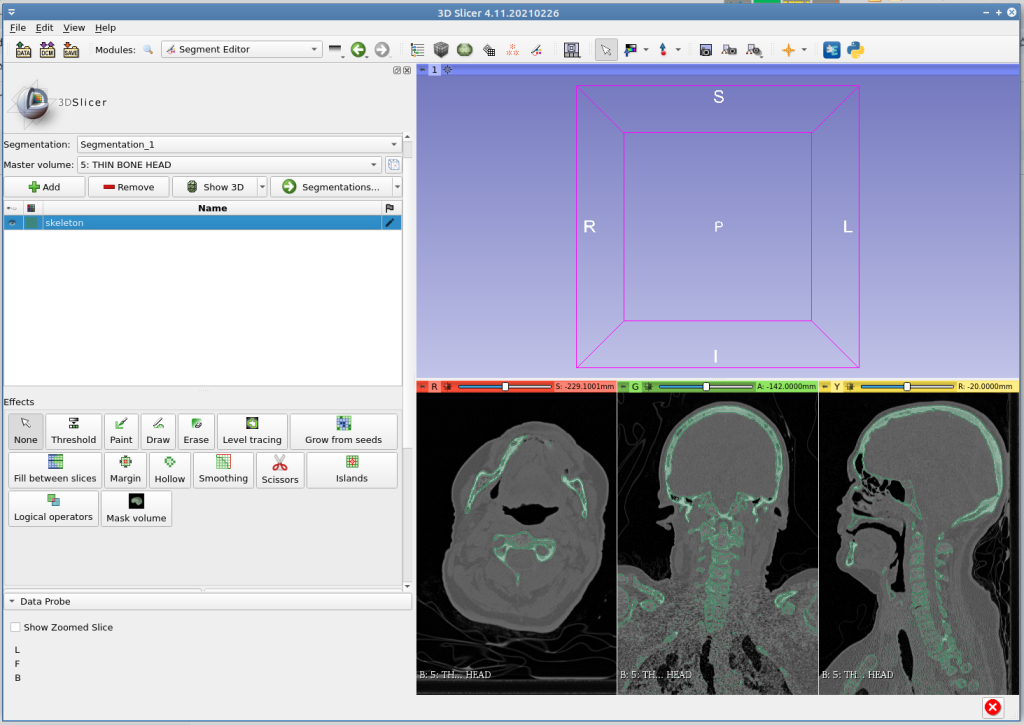
3D Slicer is a free, open source software for visualization and processing medical 3D images. Let’s see how this can be used to create a 3D model easily. After starting the software, use the “DICOM” module and select the desired CT scan to load it. Next, head to the “Segmentation Editor” module. Image segmentation is the process of locating a particular region of an image. In this case, what we want to locate is the part of our 3D volume that corresponds to the skeleton. Click on the “Add” button to create a new, empty segmentation. Next, select the “Threshold” tool and set the “Threshold Range” from 400 to the maximum value. This selects the most dense part of the image, which is exactly the bone tissue. Then, click “Apply”.
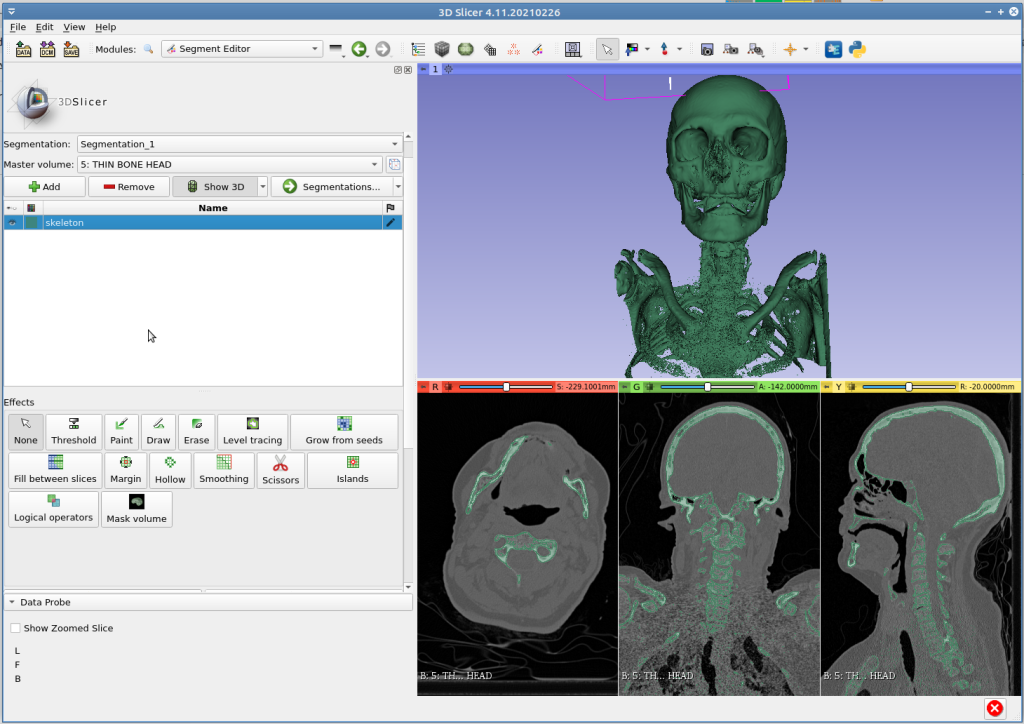
Now that the skeleton has been segmented, we are ready to create a 3D model. Open the pop-up menu right of the “Show 3D” button and uncheck “Surface smoothing”, then click on the “Show 3D” button. This operation can take a minute or two, after which a 3D model of the segmented region will be shown in the top part of the window. We are almost done. Open the pop-up menu right of the “Segmentations…” button and choose “Export to files…”. Finally, choose a the destination folder and click “Export”. A “Segmentation.obj” will be created, that’s our 3D model.
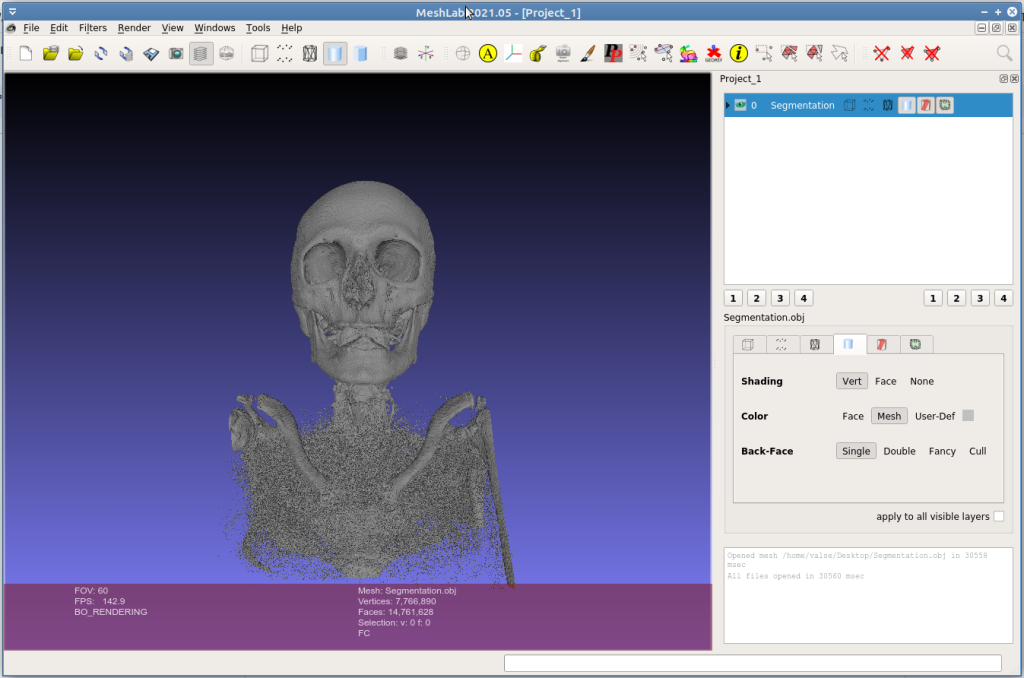
Improving the 3D mesh in Meshlab
The initial 3D model (also called mesh) created in 3D Slicer requires some further work. Indeed, you might notice your exported file is probably very large (300 MB – 2 GB). We need to process the mesh to reduce its size while preserving the information it contains. This can be done using Meshlab, which is a free, open-source software for mesh processing. After starting Meshlab, open the “File” menu and use “Import Mesh”.
There are three operations that must be performed.
Crop
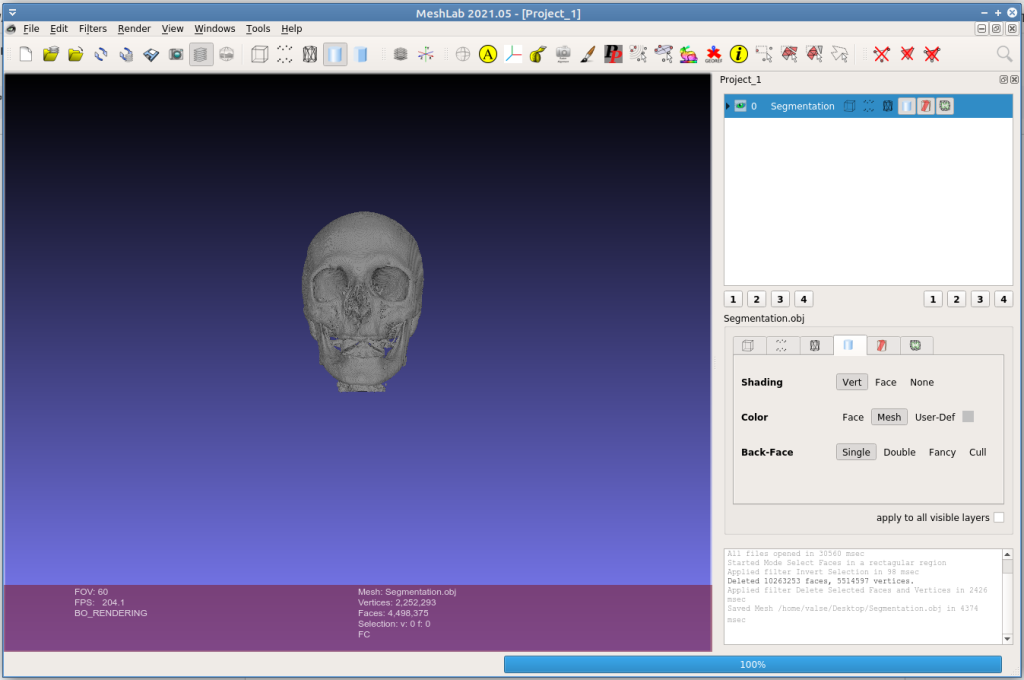
We need to reduce our model to our region of interest. In this example we want a 3D model of the skull, therefore we are going to eliminate the chest. Head over to the right part of the top toolbar and choose the “Select Faces in a rectangular region” tool. Next, draw a rectangle around the chest region.

Figure 5. Selecting the elements outside our region of interest in order to remove them.
Finally, click on the “Delete the current set of selected faces and all the vertices surrounded by that faces”. Only the skull region is left.
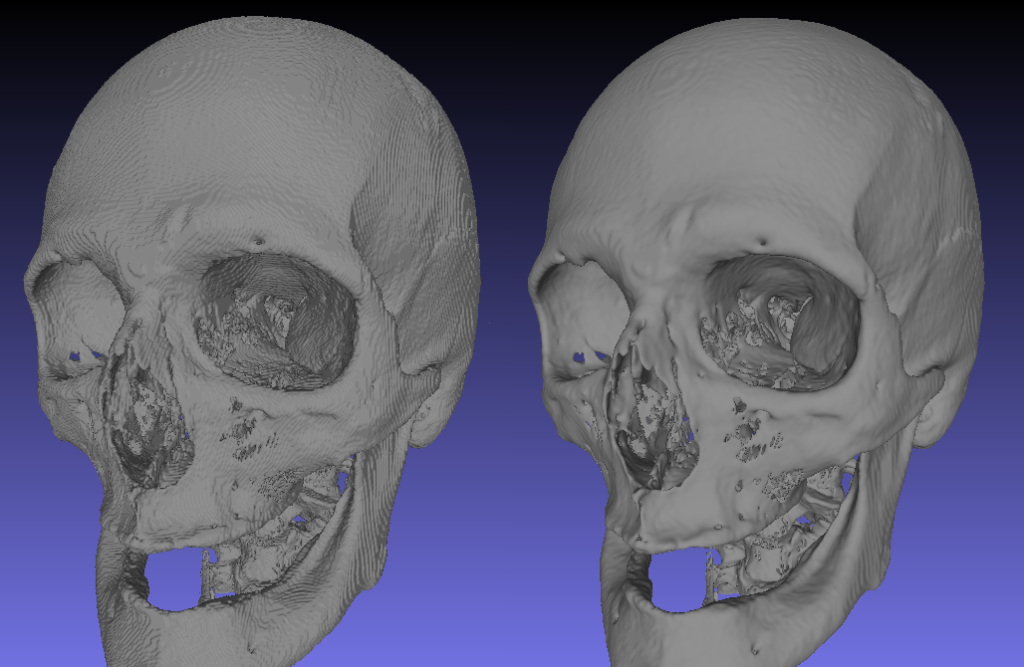
Smoothing
At this point, the surface of the 3D mesh will have pretty sharp edges. Indeed, the elements of the CT scan are essentially small cubes. Head over the “Filters” menu, select “Smoothing…” and then “Taubin smooth”. Use the preview function and adjust the “Lambda” value to get a stronger or weaker effect.
Simplification
This operation reduces the size of the mesh file by removing unnecessary small details. This is a necessary step, without which using the mesh might be very slow or even impossible on some computers. Remember to save your 3D mesh before the simplification, as there is no “undo” functionality. To perform simplification, select “Filter”, then “Remeshing, Simplification, …” and finally “Quadratic Edge Collapse Decimation”. The key parameter to set is the “Percentage reduction”, which indicates the expected size of the simplified model with respect to the current size. A value of 0.3 is very conservative, you can often go as low as 0.1, resulting in an expected 90% reduction in size. In this example, 0.15 seems like the best option: while the skull looks unchanged, the mesh file has been reduced by roughly 85%. Overall, after cropping, smoothing and simplification, the original mesh file went from over 1.2 GB to a mere 27 MB.